Contents:
- Understanding Hair Dye and How It Works
- Method 1: Colour-Removing Shampoos and Treatments
- Method 2: Clarifying Shampoos and Chelating Treatments
- Method 3: Vitamin C Treatment
- Method 4: Colour-Removing Washes (Stripper Treatments)
- Method 5: Bleach Wash (Powder and Peroxide)
- Method 6: Professional Colour Correction at a Salon
- Aftercare and Preventing Dye Damage
- Comparing Common Confusion: Dye Removal vs. Colour Correction
- Timeline and Realistic Expectations
- Specific Dye Types and How to Remove Them
- Removing Semi-Permanent Dyes (Colours Like Directions, Manic Panic)
- Removing Permanent Box Dyes
- Removing Professional Salon Dyes
- Removing Henna and Natural Dyes
- Cost Breakdown and Budget Planning
- Frequently Asked Questions
- How long does it take to remove permanent hair dye?
- Can you remove hair dye without bleach?
- Does dish soap remove hair dye?
- Will removing dye damage my hair?
- Can you remove dye and dye your hair the same day?
- Moving Forward: Your Next Steps
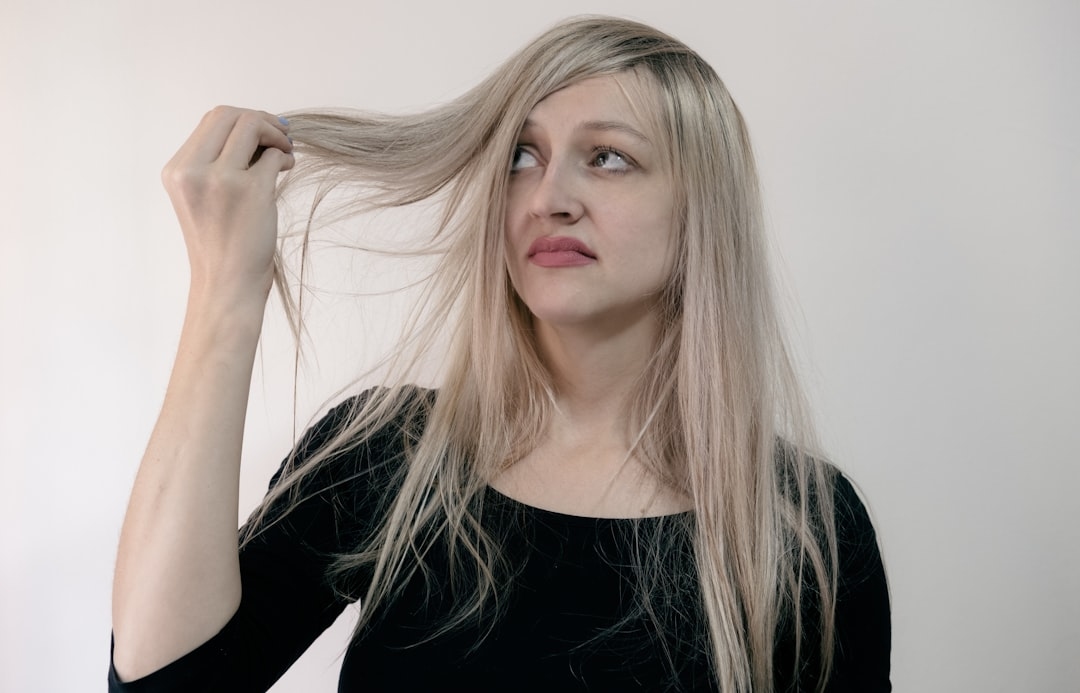
Approximately 75% of people who dye their hair will experience regret about their colour choice within the first six weeks. Whether you’ve gone too dark, chosen the wrong shade, or simply want a fresh start, understanding how to remove hair dye from hair gives you options that go far beyond living with a decision you’re not happy with.
The reality is that hair dye doesn’t simply sit on your strands like paint—it bonds with your hair’s protein structure. This means removing it requires strategy, patience, and the right approach for your specific situation. The good news? You have several proven methods available, each with different levels of intensity and cost.
Understanding Hair Dye and How It Works
Before tackling removal methods, it helps to understand what you’re actually dealing with. Hair dye comes in three main categories: permanent, semi-permanent, and temporary. Permanent dyes penetrate the hair cuticle and deposit colour molecules deep within the cortex. Semi-permanent dyes sit slightly deeper than temporary dyes but don’t require a developer, so they fade gradually over 24-28 shampoos. Temporary dyes coat the outside of your hair shaft and wash out relatively quickly.
The longer permanent dye has been in your hair, the more difficult it becomes to remove completely. Darker colours present a bigger challenge than lighter ones—removing black or very dark brown dye requires more aggressive intervention than lifting a medium blonde, for example.
Here’s a key detail: the type of hair dye matters enormously. Box dyes from supermarkets use a one-process formula with high ammonia content, making them both quick to apply and stubborn to remove. Professional salon dyes, whilst more expensive (typically £40-£80 per application), often contain conditioning agents that make removal easier and cause less damage in the process.
Method 1: Colour-Removing Shampoos and Treatments
If you’ve only recently dyed your hair—within the last week or two—colour-removing shampoos are your gentlest first option. These work by gently opening the hair cuticle and allowing some of the dye molecules to escape during washing.
How to use them: Apply the shampoo to wet hair, lather thoroughly, and leave it for 5-10 minutes. The longer you leave it, the more dye it can remove, though the instructions on your specific product should take priority. Rinse with cool water to help seal the cuticle back down. You’ll typically need to repeat this process 3-5 times before seeing noticeable results.
Popular UK brands like Colour B4 (around £6-£8) and Dylon Colour Remover (£7-£9) are widely available at Boots and Tesco. These products work best on semi-permanent dyes and lighter permanent colours. On very dark or long-set permanent dyes, you might see minimal results, but they’re worth trying before moving to more intensive methods.
One important note: colour-removing shampoos are far less aggressive than chemical strippers, so there’s minimal risk of damaging your hair. They’re particularly useful if you want to lighten your current colour rather than completely change it.
Method 2: Clarifying Shampoos and Chelating Treatments
This approach works differently from colour removers. Clarifying shampoos remove product buildup on your hair—the theory being that by stripping away the surface layer, some dye molecules come with it. It’s less targeted than a dedicated colour remover but can be gentler since you’re using a product designed for regular use.
The process: Wet your hair thoroughly and apply a clarifying shampoo (brands like Malibu C Hard Water Shampoo, around £12, or budget-friendly options like Head & Shoulders around £2) in sections. Massage for 2-3 minutes, then rinse. Repeat twice. Follow with a deep conditioning treatment because clarifying shampoos can be quite drying.
Chelating treatments are particularly effective for removing metallic deposits left by some dyes or hard water minerals that have combined with the dye. If you live in areas with hard water—common in the Midlands, East Anglia, and parts of London—chelating treatments can make a noticeable difference in dye fade speed.
These methods work gradually and are safest for frequent use, making them ideal if you want to slowly lighten your colour without committing to more drastic action.
Method 3: Vitamin C Treatment
This method has gained popularity in recent years among people wanting to fade dye gradually and naturally. High-dose vitamin C (ascorbic acid) can help lighten dyed hair by raising the hair’s pH level and encouraging the dye molecules to release.
What you’ll need: Powdered vitamin C (not tablets—purchase pure L-ascorbic acid powder, usually £8-£15 from health shops or online), a little water, a bowl (not metal), and a shower cap.
The method: Mix the powder with a small amount of water to form a thick paste. Add this to your regular conditioner (use about 3 tablespoons of conditioner for a small patch, scale up as needed). Section your hair and apply the mixture throughout, focusing on the dyed areas. Put on a shower cap and leave for 1-3 hours. The longer you leave it, the more effective it becomes, though most of the lifting happens in the first 60 minutes.
One crucial detail: this works best on permanent dyes and is particularly effective on reds and blues, which are more resistant to other removal methods. It’s less effective on blacks and very dark browns. You might need to repeat this treatment 2-4 times weekly for noticeable results, so plan for a 2-3 week process.
The vitamin C method is drying, so intensive conditioning treatments between applications are essential. Expect to spend around £15-£25 total on supplies for a full treatment course.
Method 4: Colour-Removing Washes (Stripper Treatments)
When gentler methods haven’t worked and you want faster results, colour-removing washes represent the next step up in intensity. These are sometimes called “colour strippers” or “colour removers,” and they work by chemically breaking down the dye molecules rather than just encouraging them to fade.
Popular products in the UK: Colour B4 Extra Strength (£8-£10) and Color Oops (around £12) are the most widely available options. Both are semi-permanent and work by shrinking the dye molecules so they can escape from inside the hair shaft.
How to apply: These products come with specific instructions that you must follow exactly. Generally, you’ll apply the solution to dry hair in sections, working from the roots outward. Processing time typically ranges from 20-60 minutes. The processing time matters—leaving it longer increases results but also increases dryness.
Important: These treatments don’t work on all dyes equally. They’re highly effective on permanent synthetic dyes (standard box dyes and salon colours) but less effective on natural plant-based dyes or henna, which bond differently to the hair structure. Always test on a small hidden section first.
Expect significant dryness after using colour strippers, so a deep conditioning treatment immediately after is non-negotiable. Some people do two deep conditioning treatments in the days following to restore moisture.
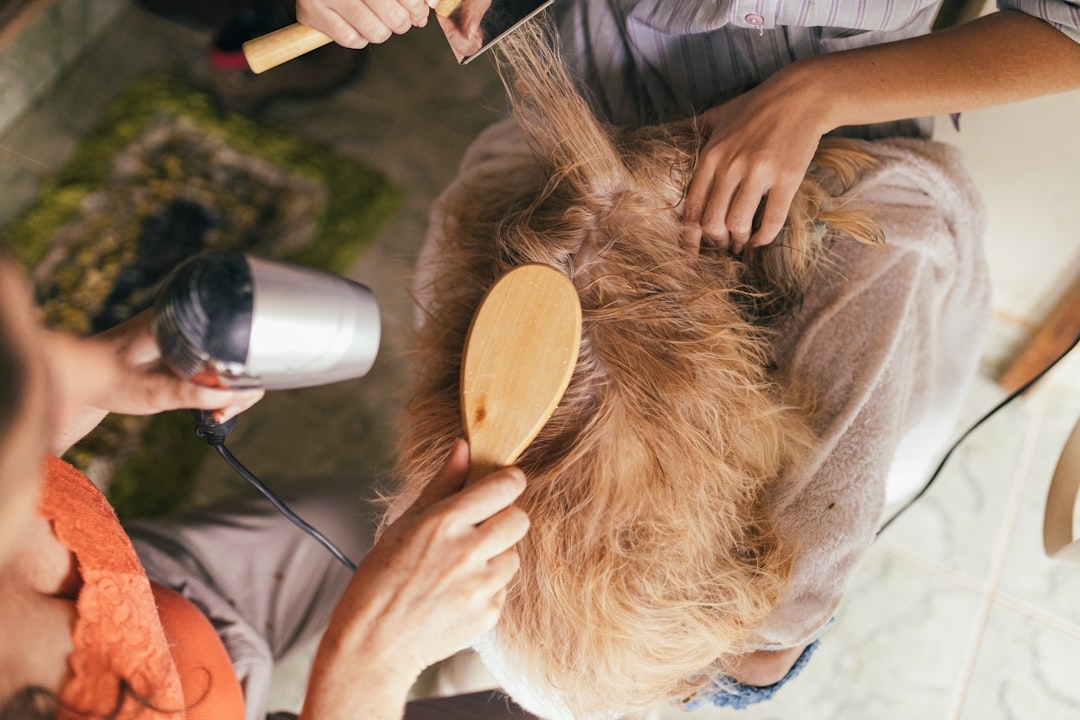
Method 5: Bleach Wash (Powder and Peroxide)
If you need to remove dark dyes to achieve a lighter colour underneath, a bleach wash is more effective than colour strippers. This method lightens both the dye and your natural hair colour, so it requires more care and isn’t suitable for everyone.
What you need: Bleach powder (brands like Wella or Schwarzkopf, around £4-£6), developer (usually 20 or 30 volume, £3-£5), a mixing bowl, measuring spoon, and applicator brush.
The process: Mix bleach powder and developer in a 1:2 ratio (1 part powder to 2 parts developer). Apply to hair in sections, starting from mid-lengths and working toward the roots last (roots process faster due to heat from your scalp). Process for 20-45 minutes, checking every 10 minutes. Rinse thoroughly with cool water and apply a conditioning treatment immediately.
The critical difference between a “bleach wash” and full bleaching: you’re using a very diluted formula and shorter processing time, which lifts colour without maximum lightness. This is less damaging than traditional bleaching whilst still being quite aggressive.
Critical reality check: Bleaching damages hair, particularly if it’s already been chemically treated. If you’ve had previous perms, relaxers, or multiple dye applications, bleaching risks significant breakage and loss. For very damaged hair, this method should be avoided. If you proceed, deep conditioning treatments 2-3 times weekly for two weeks afterward are essential.
Regional note: Salons across London and the South East offer professional bleach washes (typically £30-£50) which use better-quality bleach and professional-grade conditioners, reducing damage risk compared to DIY application.
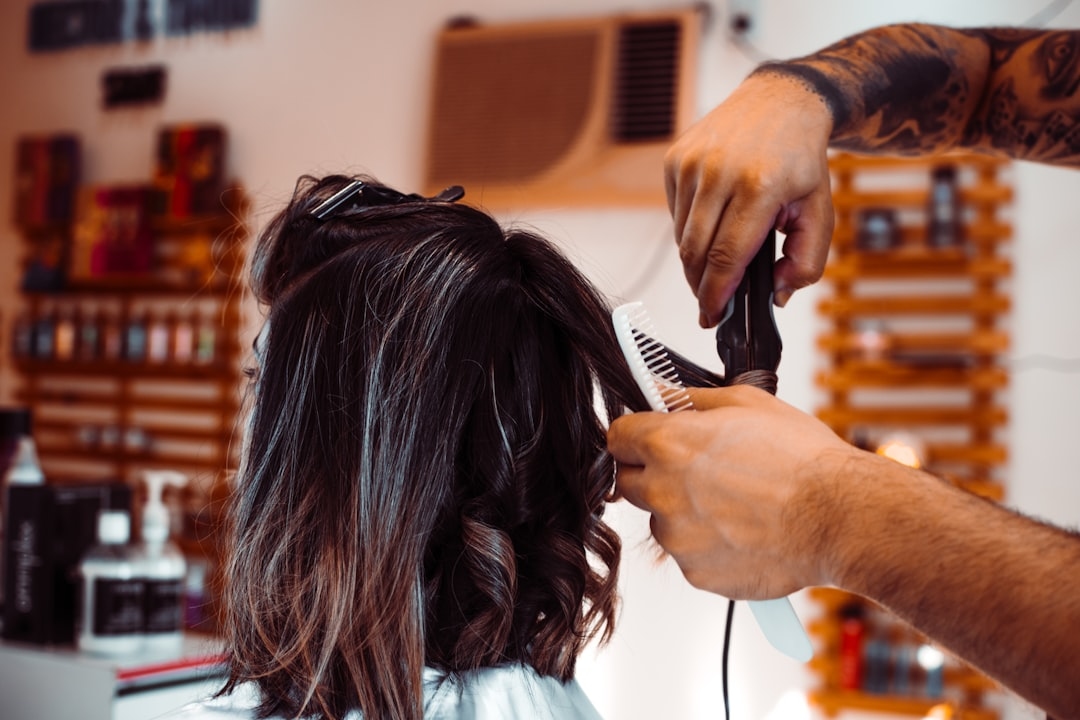
Method 6: Professional Colour Correction at a Salon
For stubborn colours, extensively lightened hair, or situations where you need guaranteed results, professional colour correction is the most reliable option. Stylists have access to professional-grade products, colour-lifting technology, and the experience to understand your hair’s unique chemistry.
What to expect: Colour correction typically costs £50-£150 depending on the complexity and your location. A consultation beforehand (often free) allows the stylist to assess your hair’s current condition and create a realistic plan. Sometimes achieving the desired result requires multiple appointments spaced one week apart to minimise damage.
One advantage of professional correction: stylists can apply conditioning treatments during the process itself, protecting your hair better than home methods. They can also adjust their approach in real-time if they notice any damage occurring.
What the pros know: Professional stylists rarely rely on a single removal method. They often combine colour strippers with targeted bleach washes and strategic use of colour depositing treatments to gradually achieve the desired result. They also understand that sometimes the fastest route to your goal colour involves going slightly lighter first, then toning, rather than trying to remove the old colour completely before recolouring.
Aftercare and Preventing Dye Damage
Regardless of which removal method you choose, aftercare is where your hair’s recovery happens.
Immediate aftercare (first 48 hours): Your hair’s cuticle is open after dye removal. Use only cool water for rinsing, apply a deep conditioning treatment within 2 hours, and avoid heat styling. Sleep on a silk pillowcase if possible—cotton absorbs moisture and creates friction that can damage open cuticles.
Weekly treatment: For two weeks after removal, use a protein-based conditioning treatment once weekly. Products like K18 or Olaplex (£25-£45) are expensive but highly effective. Budget alternatives like Schwarzkopf BC Bonacure (around £8) work reasonably well if used consistently.
Styling considerations: Avoid heat styling for at least one week after dye removal. When you do return to heat styling, always use a heat protectant spray. Your hair is more porous after dye removal, meaning it loses moisture faster and becomes frizzy more easily.
Shampooing strategy: Switch to a colour-safe shampoo (brands like Colour Wow, around £12) which are gentler than standard shampoos. Wash your hair in cool water only—hot water opens the cuticle and allows remaining dye molecules and moisture to escape. Wash only 2-3 times per week instead of daily.
Moisture is critical: Leave-in conditioning sprays (around £8-£12) applied to damp hair before styling help maintain hydration. Your hair will be thirstier than usual for several weeks.
Comparing Common Confusion: Dye Removal vs. Colour Correction
Many people use these terms interchangeably, but they’re actually different processes. Dye removal is exactly what we’ve discussed—getting the colour molecules out of your hair. Colour correction is different: it’s applying a new colour to neutralise unwanted tones in your current colour.
For example, if your box dye turned out too orange, dye removal would involve stripping out the orange dye entirely. Colour correction would involve applying an ash or blue-toned dye to neutralise the orange without removing it first. Colour correction is faster and less damaging but works only for tone adjustment, not complete colour removal.
Choose dye removal if: you want to go significantly lighter, you want to change colour families (red to brunette, for instance), or you simply want to start fresh on virgin hair. Choose colour correction if: you’re happy with the lightness level but want to adjust the tone, or you want to avoid aggressive treatment methods.
Timeline and Realistic Expectations
How long removing hair dye takes depends entirely on your method and the type of dye you’re removing. Here’s a realistic timeline:
- Colour-removing shampoos: 3-5 applications over 1-2 weeks for noticeable lightening on semi-permanent dyes
- Vitamin C treatments: 2-4 applications over 2-3 weeks for gradual lightening on permanent dyes
- Colour strippers: Single application for immediate results, though results depend heavily on dye type
- Bleach wash: 1-3 applications over several weeks to achieve significant lightening without excessive damage
- Professional colour correction: 1-3 salon visits depending on starting point and desired result
One realistic detail: if you’re trying to go from black to blonde, you’re looking at a minimum 4-6 week process even with professional help, involving multiple treatments spaced apart. Expecting to do it in a weekend is setting yourself up for disappointment or severe damage.
Specific Dye Types and How to Remove Them
Removing Semi-Permanent Dyes (Colours Like Directions, Manic Panic)
Semi-permanent dyes are the easiest to remove because they don’t penetrate as deeply. Colour-removing shampoos and clarifying treatments are often sufficient. Many people find that frequent shampooing with regular shampoo (hot water optional, though cool is better) will fade semi-permanent dye within 2-3 weeks without any special treatment.
Vitamin C treatments also work particularly well on semi-permanent dyes. If you want faster results, colour strippers are highly effective and less damaging on these dyes than on permanent ones.
Removing Permanent Box Dyes
Standard box dyes from Superdrug, Boots, and supermarkets use high-ammonia formulas that bond very firmly to hair. These require either colour strippers, bleach washes, or professional treatment for complete removal. Gentler methods (colour-removing shampoos, vitamin C) will lighten them gradually but may not remove them completely.
The colour family matters: warm tones (reds, oranges, golds) fade faster than cool tones (blues, purples, greys). Box-dye blacks are notoriously stubborn—expect to need multiple treatments regardless of method chosen.
Removing Professional Salon Dyes
Interestingly, professional salon dyes are sometimes easier to remove than box dyes because they use better chemistry and often contain fewer unwanted pigments. A professional stylist’s colour remover often works more effectively on salon dye than on box dye.
That said, some professional dyes (particularly metallic or ash tones) can be stubborn. This is where professional colour correction shines—the stylist understands the specific brand and formula used and can choose the most effective removal method.
Removing Henna and Natural Dyes
If your dye is henna-based or a plant-based natural dye, standard removal methods won’t work. These bond to hair differently and can actually become darker if you use bleach. Your only safe options are: waiting for the colour to grow out and trim off, or using very gentle fading methods like vitamin C treatments and frequent shampooing, though results are unpredictable.
Many salons refuse to work on henna-dyed hair because the chemistry is unpredictable. If you’re considering moving away from natural dyes, it’s worth having a consultation with a professional first.
Cost Breakdown and Budget Planning
Depending on your chosen method and how much dye you need to remove, here’s what to realistically budget:
- Gentle methods (shampoos, vitamin C): £15-£30 total, 2-3 weeks of application
- Colour strippers: £8-£15, single application, immediate results
- DIY bleach wash: £10-£15 for supplies, 1-3 applications
- Professional salon correction: £50-£150 per session, potentially 2-3 sessions needed
- Aftercare conditioning treatments: £20-£80 for two weeks of intensive care
The cheapest option isn’t always the wisest. A £60 professional correction that leaves your hair healthy is better value than a £15 DIY approach that leaves you with damaged, breaking hair requiring a £200 cut to fix.
Frequently Asked Questions
How long does it take to remove permanent hair dye?
This depends on the method and dye type. Colour-removing washes provide immediate visible results but may not remove dye completely. Gentler methods like clarifying shampoos or vitamin C treatments take 2-4 weeks of repeated applications. Professional colour correction typically shows results in 1-3 salon visits.
Can you remove hair dye without bleach?
Yes. Colour-removing shampoos, colour strippers, vitamin C treatments, and professional non-bleach colour removers can all lighten or remove dye without bleach. These work best on semi-permanent dyes and lighter permanent colours. For very dark permanent dyes, bleach is often the most effective option, though professional colour correction sometimes offers non-bleach alternatives.
Does dish soap remove hair dye?
Dish soap is very drying and can strip some surface dye due to its harsh surfactants, but it’s not formulated for hair and doesn’t contain conditioning agents to protect against damage. Using clarifying shampoo designed for hair is more effective and less damaging. Never use dish soap regularly on your hair.
Will removing dye damage my hair?
It depends on the method. Colour-removing shampoos and vitamin C treatments cause minimal damage. Colour strippers and bleach washes do cause some damage, making intensive aftercare essential. The least damaging approach is professional colour correction, where trained stylists minimise damage through proper technique and product choice. However, your hair is already somewhat damaged if you’ve dyed it previously, so some additional stress is inevitable.
Can you remove dye and dye your hair the same day?
Not advisable. Your hair’s cuticle is open and damaged after dye removal. Applying new dye immediately subjects your already-stressed hair to additional chemical stress. Wait at least 3-5 days, during which you should do intensive conditioning treatments. This gives your hair time to recover and actually improves how the new dye takes and looks.
Moving Forward: Your Next Steps
Removing unwanted hair dye is absolutely possible, and you’re not locked into a colour you hate. The method you choose depends on your starting point, timeline, budget, and how much hair damage you’re willing to risk.
Start with the gentlest option appropriate to your situation. If you’ve only recently dyed your hair, colour-removing shampoos or vitamin C treatments might be enough. If you need faster results or have stubborn permanent dye, colour strippers are worth trying before moving to bleach.
Don’t hesitate to consult a professional stylist, particularly if your hair has been through previous chemical treatments. The consultation is often free, and a professional assessment beats guessing whether your hair can handle aggressive methods. For your next colour choice, remember that understanding removal options beforehand makes it easier to choose colours confidently, knowing you have a path forward if the result isn’t what you expected.