Contents:
- The Science Behind Frizz and How to Dry Hair Without It
- The Microfibre Towel Advantage
- Pre-Drying Product Application
- Heat Protectant Products
- Smoothing Serums and Oils
- Leave-In Conditioners
- The Blow Dryer Technique That Stops Frizz
- Temperature Settings Matter
- The Directional Drying Method
- Speed Matters Too
- Post-Drying Steps
- Common Mistakes to Avoid
- Budget Breakdown for Frizz-Free Drying
- Different Approaches for Different Hair Types
- Fine or Thin Hair
- Thick or Coarse Hair
- Curly or Textured Hair
- FAQ Section
- How long does frizz-free drying take?
- Can you prevent frizz without a blow dryer?
- Does humidity truly make frizz worse?
- Will expensive products reduce frizz better than technique?
- How do you fix frizz on day two hair?
- Your Frizz-Free Future Awaits
Frizz has defeated even the most determined hair care enthusiasts. You step out of the shower with smooth, damp hair, blast it with your blow dryer, and by the time you’re walking out the door, small hairs are escaping in every direction. This happens because standard drying methods disrupt your hair’s natural structure, causing the cuticles to lift and allow moisture to escape and re-enter unpredictably. The good news: achieving genuinely frizz-free hair requires understanding what causes frizz, not expensive products or salon-only secrets.
One of my clients, Jennifer from Manchester, spent years fighting her naturally wavy hair before discovering proper drying techniques. “I thought expensive serums were the answer,” she told me. “Then I learned how to actually dry my hair correctly, and suddenly the frizz just… stopped. I wish I’d known this ten years ago.” Jennifer’s experience mirrors what thousands of people discover once they understand the mechanics of drying hair without disrupting its structure.
The Science Behind Frizz and How to Dry Hair Without It
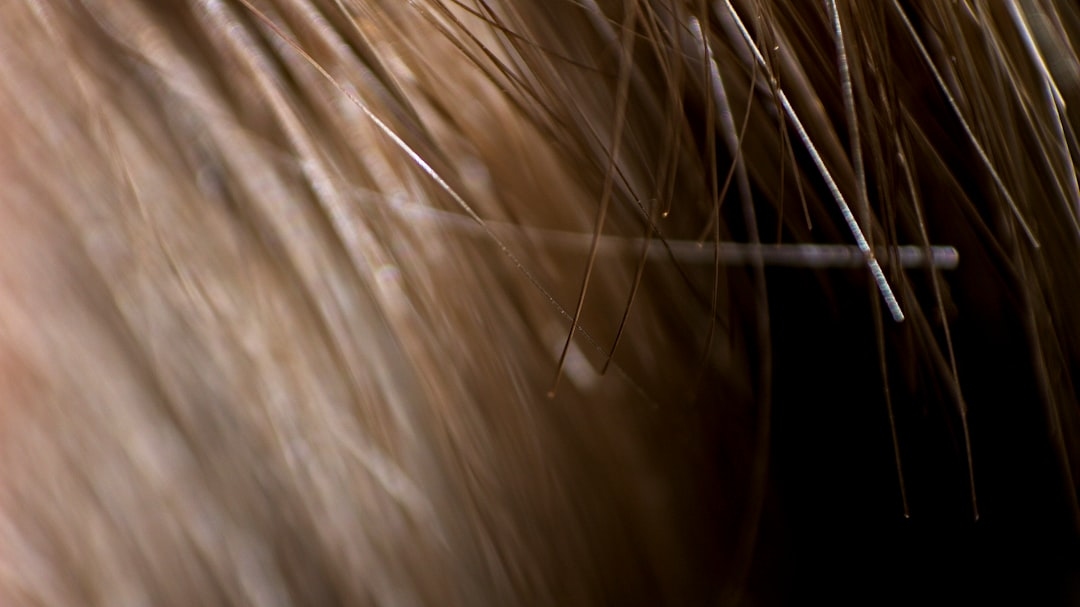
Frizz occurs when water molecules penetrate the hair shaft, causing it to swell slightly and raise the cuticle layer. This exposed structure allows more moisture to enter and exit, creating that fuzzy, undefined appearance. Hair stylist Dr. Eleanor Hartley, trichologist at Edinburgh’s premier hair clinic, explains: “The key to frizz prevention is managing moisture—both getting it out efficiently and preventing new moisture from entering afterward. Technique matters more than product.”
Your hair contains three layers: the cuticle (outer protective layer of overlapping scales), the cortex (protein and pigment layer), and the medulla (innermost core). Frizz happens when the cuticle layer lifts. Drying hair aggressively—with high heat and rough towel treatment—raises cuticles. Conversely, gentle drying while cuticles are still relaxed (within the first 10-20 minutes post-shower) minimizes frizz by sealing moisture in rather than letting it escape and re-absorb later.
Environmental humidity compounds the problem. In humid conditions, your hair’s cuticle naturally lifts to absorb moisture from the air. Your scalp also releases natural oils less efficiently in humidity. The combination of lifted cuticles and moisture-rich air equals maximum frizz. This is why people living in England’s coastal regions or urban areas with higher moisture levels experience more frizz than those in drier climates.
The Microfibre Towel Advantage
Your towel choice matters enormously. Standard cotton towels have rough, absorbent fibres that catch and disrupt hair cuticles as you dry. Each time you rub your hair with a regular towel, you’re essentially rubbing the cuticle scales the wrong way, encouraging them to lift. Microfibre towels (also called turbie towels) cost £8-15 and work differently. Their ultra-fine fibres absorb water without disturbing cuticles.
The process is simple. After shampooing, gently squeeze excess water from your hair without wringing. Wrap a microfibre towel around your hair and let it sit for 5-10 minutes. Microfibre actively draws water into its structure rather than rubbing it away. When you unwrap the towel, your hair is significantly drier than it would be after conventional towel drying, yet your cuticles remain relaxed and flat. This 5-10 minute pause also allows you to apply hair products that work best on damp (not dripping wet) hair.
Pre-Drying Product Application
Heat Protectant Products
Before heat styling, apply a heat protectant product to damp hair. These products create a thin barrier that prevents excessive moisture loss and cuticle disruption. Look for products with silicone or plant-based film-formers (dimethicone or cyclomethicone in the ingredient list). Brands like OGX, Moroccanoil, or Tresemmé range from £5-18. Apply to mid-lengths and ends, avoiding the scalp where it can create greasiness.
Smoothing Serums and Oils
Lightweight oils help seal the cuticle. Argan oil, coconut oil, or commercial smoothing serums (£6-16) applied sparingly to damp ends prevent moisture loss during drying. Use just 2-3 drops for medium-length hair; excess product weighs hair down and creates greasiness. Pat the product through your hair rather than combing it, which can create breakage on wet strands.
Leave-In Conditioners
Leave-in conditioners designed for drying hair provide slip (reducing friction between strands) and moisture balance. Apply to damp hair and comb through gently. This reduces tangles that lead to breakage and helps hair dry more evenly. Expect to spend £7-14 on a good leave-in conditioner.
The Blow Dryer Technique That Stops Frizz
Temperature Settings Matter
High heat is frizz’s best friend. Heat opens the cuticle layer, and high temperatures open it aggressively. Use medium heat settings, which dry hair effectively without excessively disrupting the cuticle. Ionic blow dryers (prices £25-100) emit negative ions that seal the cuticle as you dry, actively reducing frizz. These cost more initially but deliver noticeably less frizz than conventional dryers.
The Directional Drying Method
Always direct your blow dryer downward, from roots to ends. Never point heat upward against the hair grain. Downward drying smooths the cuticle; upward drying raises it. Use your blow dryer’s concentrator nozzle (the narrow attachment) to direct heat precisely rather than diffusing it everywhere. Concentrate on roots first—they take longest to dry and are closest to the scalp where oil production helps seal cuticles.
Dry in four sections. Begin with the nape area (lowest section), then move to sides, then the crown. Finish with the front sections nearest your face. This progression allows each section time to cool and set its cuticle position before you finish. Cooling is essential—end your drying with a 10-second blast of cool air (most blow dryers have a cool button). This cools the cuticle and seals moisture inside.
Speed Matters Too
Don’t linger in one spot. Keep your dryer moving continuously across each section. Staying in one place too long over-dries that area and can create heat damage. The whole process should take 15-25 minutes depending on hair length and thickness. Rushing causes you to use higher heat; taking your time allows medium heat to be sufficient.
Post-Drying Steps
Once completely dry, your cuticles need sealing. Light hairspray or finishing spray (£4-10) can help. Alternatively, a tiny amount of finishing serum applied to your hands and smoothed over dry hair provides shine and frizz control. Don’t overload with product—a little goes far on dry hair.
If you must blow dry quickly (before work, for instance), apply a smoothing cream beforehand. Products like Frizz Ease or Lee Stafford (£5-9) contain ingredients that actively prevent cuticle-lifting. They’re designed specifically to combat the humidity and friction that cause frizz during drying.
Common Mistakes to Avoid

Mistake one: using a regular towel vigorously. This disrupts cuticles before you even start blow drying. Mistake two: blow drying soaking wet hair. Extremely wet hair requires excessive heat and time to dry, both of which increase frizz. Mistake three: using only high heat. Medium heat with a bit more drying time beats high heat for frizz prevention. Mistake four: ignoring the cool-shot at the end. Those final 10 seconds of cool air seal everything in place and noticeably reduce frizz.
Mistake five: applying products incorrectly. Heat protectant should be on damp hair before drying, not dry hair afterward. Mistake six: point drying upward. This lifts cuticles directly. Downward is always better. Mistake seven: overdrying. Hair that’s slightly damp (not wet, but not bone-dry) tends to have less frizz than completely desiccated hair because there’s still some moisture in the cortex to keep it flexible.
Budget Breakdown for Frizz-Free Drying
Initial investment: microfibre towel (£12), ionic blow dryer (£50), heat protectant spray (£8), leave-in conditioner (£10). Total: £80. This covers your essential tools for 2-3 years. Monthly ongoing costs (replacement products): approximately £3-5.
Compare this to monthly salon blowouts at £30-50 each. Your home setup pays for itself within 2-3 months, then saves you £300+ annually.
Different Approaches for Different Hair Types
Fine or Thin Hair
Use a light heat protectant (volumising sprays rather than creamy products). Fine hair looks best when dried quickly on medium heat rather than slowly on low heat—slower drying allows more moisture to re-enter. Skip heavy oils; instead use lightweight serums. Dry completely—damp fine hair looks limp and tends toward greasiness.
Thick or Coarse Hair
Thick hair benefits from heavier products. Use creamy leave-in conditioners and oils freely. Your hair can handle medium-high heat without damage. Thicker hair dries slower, so patience is essential. Take 25-30 minutes rather than rushing. Thicker hair also benefits more from the cool-shot finish since it has more mass and cuticle area to seal.
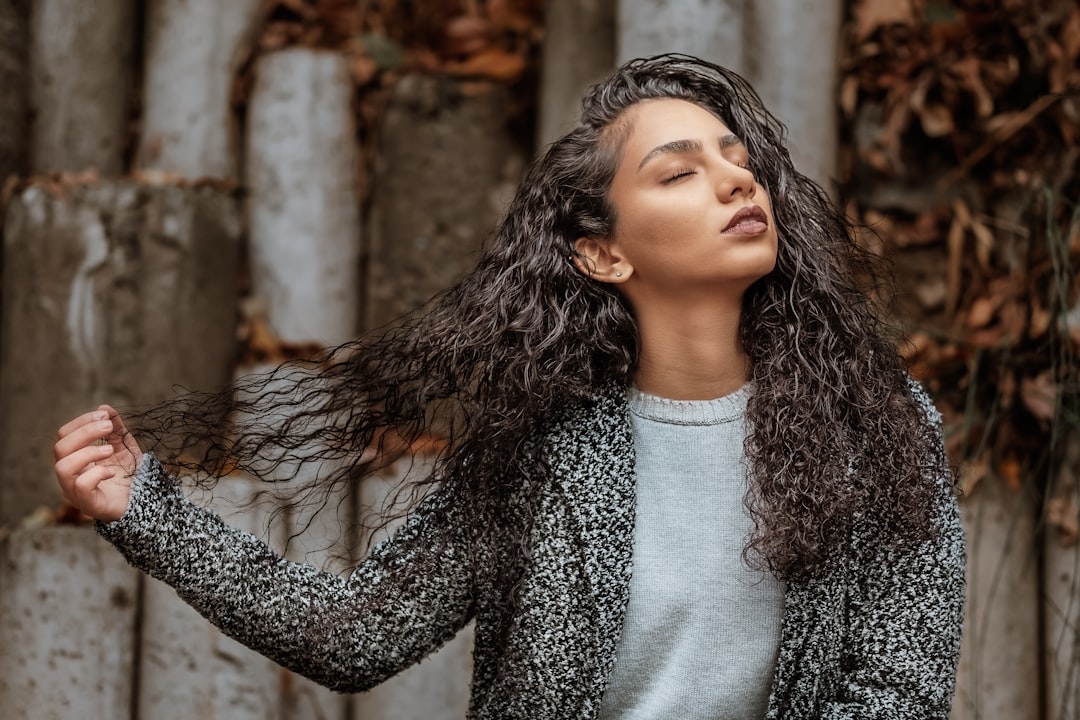
Curly or Textured Hair
Rather than blow drying straight, use a diffuser attachment. A diffuser spreads heat gently and helps curls dry in their natural pattern rather than being blown flat. Apply products to soaking wet hair, scrunch the diffuser gently under sections, and hold for 5-10 seconds per section. Curly hair frizzes more easily, so extra product and gentler drying are essential.
FAQ Section
How long does frizz-free drying take?
Typically 15-25 minutes depending on hair length, thickness, and your technique. Fine, shoulder-length hair takes 12-15 minutes. Thick, long hair takes 25-30 minutes. Speed comes with practice—you’ll get faster as you develop muscle memory for sectioning and directional drying.
Can you prevent frizz without a blow dryer?
Yes, though it requires more time. Air-dry on damp hair while wrapping it in a microfibre towel or using a cotton t-shirt. Apply smoothing products and let hair dry 80% of the way naturally, then finish blow drying on medium heat for the final 20% to seal everything. This takes 1-2 hours but reduces heat exposure.
Does humidity truly make frizz worse?
Absolutely. Humidity above 60% increases frizz noticeably. Coastal areas and northern UK regions experience this more. In humid weather, use anti-frizz serums liberally and finish with strong-hold hairspray. Indoor humidity from showers and central heating also matters—ventilate your bathroom while drying hair.
Will expensive products reduce frizz better than technique?
No. A £5 heat protectant spray combined with proper drying technique outperforms a £40 serum with poor technique. Technique is 70% of frizz prevention. Products help the remaining 30%. Master the drying method first, then experiment with products.
How do you fix frizz on day two hair?
Light misting with water and a tiny bit of serum smoothed over the surface, or a quick 2-minute touch-up with a blow dryer on cool/medium setting. Alternatively, restyle completely using the same techniques. Never try to re-wet and re-dry day-two hair fully—repeated wetting compromises the cuticle.
Your Frizz-Free Future Awaits
Frizz-free drying isn’t about expensive treatments or genetic luck. It’s about understanding your hair’s structure and treating it accordingly. A microfibre towel, proper blow dryer technique, and the right products create consistently smooth, polished hair. The investment is modest, the learning curve is gentle, and the results appear immediately. By next week, you’ll notice your hair looks smoother, shinier, and infinitely more intentional. That’s the compound effect of working with your hair’s biology rather than against it.